SHOP
*Canadapost strike* Using ChitChats now, ordering is safe. :) *USA BUYERS* No Tariffs at all, i am now CUSMA certified!
*Canadapost strike* Using ChitChats now, ordering is safe. :) *USA BUYERS* No Tariffs at all, i am now CUSMA certified!

· Crusty Bread: Apple & Cheddar & Bacon
November 12, 2012 3 min read 2 Comments

* Si vous préfèrez une version française, par ici!
First of all, let's all please notice that this month's recipe doesn't have a single trace of fish in it. MIRACLES! :D
Second of all, you're probably thinking that you can't make this bread. Let me stop you right there, wo/man.
I have been telling myself for years now that I would love to be able to make homemade bread, but all the kneading and stuff had me convinced it was basically impossible without training of some sort. Turns out, I was completely wrong. More wrong than that and you're in the gutter.
This recipe is a VERY EASY one, a VERY FORGIVABLE one, and a VERY FLEXIBLE one, too. Meaning: you WILL be able to do it and you WILL be able to do a different flavor, if this one is not to your taste.
Let me just specify that the basic recipe of this bread is not my creation. I found it here. The apple/cheddar/bacon part is my idea, tho!
Ready? :)
1- In a bowl (choose a size making sure that there is space for the mixture to "grow"), mix together 3 cups of flour, 1 3/4 teaspoon of salt, and 1/2 teaspoon of yeast. (I use regular active dry yeast, but the woman on that other blog post used instant yeast. Anything works, truly!)
* If you want to do a plain (no flavor) bread, skip steps 2 and 3.
** Alternatively, if you want to do another flavor than the one I am suggesting, now is the time to get creative!
2- Grate your cheddar, cut your apple (without skin) in small cubes, cook your bacon and cut in small pieces. Everything is per your taste, don't worry too much about quantities. Again, it is a very forgivable recipe.
3- Mix them with your previous dry ingredients.
4- Add 1 1/2 cups of water. Mix well with a spatula, make su
re everything is nicely blended. The result is a sticky mixture, as seen above.
5- Cover with plastic wrap. Let sit on the counter 12 to 18 (even 24) hours. This part is NOT flexible, tho. You MUST let it sit out 12 hours minimum. So, you will indeed need to plan ahead for this recipe, because of the waiting time.
After step 5, it will look like this next picture.
Now, 12 hours (or more) later, it's baking time!
You will need an oven resistant cookware piece, with lid. I have this small Le Creuset one, but any pot with lid (that is resistant to 450degrees temperature, including the knob) will work. The idea is to sort of create an oven within an oven.
6- Put your pot (with the lid on) in the oven, and heat it at 450. Leave it in there for 30 minutes.
7- While it's heating up, get a sheet of parchment paper. Kind of heavily, flour it.
8- Pour your dough on it. (Since my cast iron is pretty small, I literally cut the dough in half to bake in 2 separate breads, one after the other. Obviously, if you have a bigger one than mine, you can do it in one single loaf. Baking times are the same!)
9- Flour your hands, the mixture is very sticky! Then, just form a round shape. No kneading or nothing. Simple, huh? Cover your ball with plastic wrap while the oven is still heating.
10- Once the 30min of heating your pot is done, take it out, and take off the lid. Obviously, everything is just SO HOT, so be careful! Then put your dough in, with the parchment paper (it wont burn). Again, don't burn yourself, be careful!
11- Put the lid back on, and back in the oven for 30 minutes.
12- After 30 minutes, take everything out, and lift up the lid to discover the half baked bread, just like the picture above. Soooo pretty already, right?
13- Put back in the oven 15 minutes, without the lid.
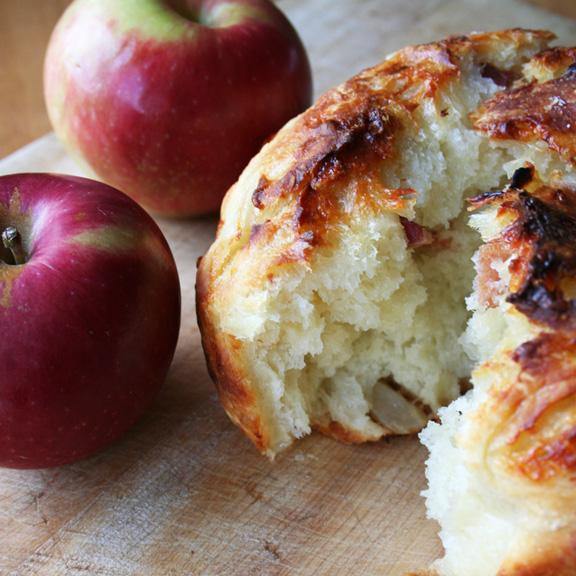
14- THAT IS ALL, folks. Your yummy crusty bread will then be baked, and perfect. Grab the parchment paper, and take it out of the pot. Leave to rest and cool down.
Or eat it half cooled... Y'know, if you can't resist, just like me. Haha!
I have SO MANY other flavor options in my head, it's about to burst. Cranberries and orange zest? Mix of nuts? Herbal? Plus, I will definitively buy a bigger cast iron pot soon.
I'm already sold to this recipe. I CAN MAKE HOMEMADE BREAD. Oh my!
And now, so can YOU! :)
Save2 Responses
Janick
October 26, 2014
You SHOULD try it dear! I’m no master of the kitchen (not just saying that) and it was a first perfect try!
Then i tried adding other stuff to the plain recipe, and it worked perfectly too.
It’s full proof, I’m telling ya! :)
Leave a comment
Comments will be approved before showing up.
Subscribe
Sign up to get the latest on sales, new releases and more …


Rachel
October 26, 2014
WHOA. I AM SO TRYING THIS. You are so reassuring about it that I feel I must try!